RRY Deck Guide: Adam Smasher, Dum Dum and V
AI TRANSLATION NOTE
This is the English edition of a deep-dive originally written in German. The translation was AI-assisted and human-reviewed for terminology, rules accuracy, and Rogue-persona tone. All direct quotes from RareTotem’s videos come verbatim from the original English sources, not back-translated from German. The original German article is available at cyberpunk-tcg-news.de.
Red Red Yellow is the deck the community keeps pointing at as the answer to BBG (Blue Blue Green, the Hanako control deck), and this is how you pilot it. We took the list RareTotem presents in the RRY video, the one with Adam Smasher, Dum Dum and V: Streetkid, went through it card by card and redid every number you’ll need at the table.
Short version (as of October 14, 2026)
Wild Things files RRY under aggro, while RareTotem calls RRY “a nice mid-range style deck”. That’s how this list plays, too: midrange with tempo spikes. Only 6 of its 41 cards are Units that cost 4 or less. Pressure starts on turn 4 with Yorinobu Arasaka: Steel Dragon and peaks on turn 6 with Adam Smasher. Against BBG it won’t win on autopilot, because BBG removes your Units almost exclusively by tucking them under the deck, which leaves Yorinobu with nothing to pull out of the trash (your discard pile).
Nobody has shown it’s tournament-strong, either. No official Constructed events have happened yet, and the list itself sits at 0 likes with no description and no sideboard. Its real selling point is price: €6.47 by Cardmarket trend. The Rares in it only have a foil trend with few listings; details are in the cost section. The sideboard in this guide is our own suggestion.
The meta series
- Overview: the meta before the first tournaments
- BBG Control (Hanako, Alt, Jackie)
- River’s Closet: River Ward Gear
- Mono-Blue Judy
- RRY: Smasher, Dum Dum, V and Yorinobu
This list wins from turn four on
Sleeve this up and your win happens on turns 4 to 6. The first three turns are setup, mostly selling cards for Eddies and feeding the trash. Anyone who wants to swing full throttle on turn 1 brought the wrong deck.
Look at the cost curve. Of the 41 cards, 15 are Units, and only six of those cost 4 or less (three Augmented Negotiators, three 6th Street Recruits). Every other Unit costs 5, 6 or 7 Eddies, the in-game currency, written €$. The list gets its spotlight from the YouTube channel RareTotem, where RRY is called “a nice mid-range style deck”. RRY stands for Red Red Yellow, meaning two red Legends and one yellow (Legends are the three leader cards every deck runs). Midrange means the deck wants to win the middle of the game.
The pressure comes in three jumps. Turn 4 brings Yorinobu Arasaka: Steel Dragon, two bodies on the field for one card. Gear then pushes your Units to 10 power, which is where an attack steals two Gigs (the dice that count as victory points). Adam Smasher closes things out from turn 6, removing a rival Unit and attacking right away.
On ExBurst, a stats site for decklists, the event wins field reads “None tracked yet”. The blog Gamertag Mythras puts it bluntly: “Nobody has won a tournament with any of these decks yet.” So every percentage in this guide that comes from deckbuilders measures popularity, meaning how often a card shows up in public lists. That’s not a win rate.
We covered the print-and-play meta back in May, in an article that only exists in German. Lists and card data have gotten a lot denser since, and that’s what this guide runs on.
Sapiens26 is in the credit field, RareTotem presents the list
You’ll find the list on its deck page in the cyberpunktcg.com builder. The credit field says Sapiens26. RareTotem posted it, and the RareTotem video presents it as a beginner list. We found no profile and no original deck from Sapiens26. The attribution rests on the credit field and on the name of a second list, “Chrome Armageddon Sapiens modded”.
The list itself has barely any backing: 0 likes, 142 views, no description, no sideboard. The Legend trio Smasher, Dum Dum and V appears in 9 public RR decks (two red Legends plus any third), the combination Dexter, Muamar and V in 15. RareTotem even calls the Dexter-Muamar-V list a personal pick: “a personal favorite of mine, and it’s also the one that I prefer to run”.
Take the big words in the video with a grain of salt. Roughly in the last fifth, in the decklist chapter, RareTotem calls the list “one of the initial breakout red Yellow decks”, “a great beginner red Yellow deck” and “a proven powerhouse”. Nothing backs up “proven”. There’s no tournament number behind it, because none exists.
For a newcomer it’s still the cleanest teaching deck around, since it plays every mechanic that defines RRY in its basic form: Yorinobu with a free Unit, Gear for the 10-power threshold, Braindance removal and a Go Solo finisher. It’s also cheap. Starter decks and boosters cover it, no pricey special prints required. Once this one clicks, the variants stop being mysterious.
We pull in three more lists for comparison: “Chrome Armageddon Sapiens modded” by HungSpellboundGames, “RED Cyberdeck Wins” by TimFandango and a 40-card variant on ripperdeck. Where those lists build differently, we point it out in the matching spot.
| Qty | Card | Type | Color | Cost | Power |
|---|---|---|---|---|---|
| 1 | Adam Smasher: Ender of Legends | Legend | Red | 9 | 9 |
| 1 | V: Streetkid | Legend | Red | 5 | 6 |
| 1 | Dum Dum: Maelstrom Triggerman | Legend | Yellow | – | – |
| 3 | Augmented Negotiators | Unit | Yellow | 3 | 2 |
| 3 | 6th Street Recruits | Unit | Red | 4 | 6 |
| 3 | Rockn‘ Rockerboy | Unit | Yellow | 5 | 8 |
| 3 | Animals Wrecker | Unit | Red | 6 | 10 |
| 3 | Yorinobu Arasaka: Steel Dragon | Unit | Red | 7 | 9 |
| 3 | Mantis Blades | Gear | Red | 1 | +2 |
| 3 | Satori: Sword of Saburo | Gear | Red | 2 | +2 |
| 3 | Zetatech Faceplate | Gear | Yellow | 2 | +2 |
| 3 | All is Lost | Program | Red | 1 | – |
| 3 | Industrial Assembly | Program | Red | 1 | – |
| 2 | Appetite for Destruction | Program | Red | 3 | – |
| 3 | Bonnie and Clyde | Program | Red | 3 | – |
| 3 | Over the Edge | Program | Red | 3 | – |
| 3 | Carnage at the Colosseum | Program | Red | 6 minus discount | – |
And the cost curve across all 41 cards:
| Cost | Cards | Which ones |
|---|---|---|
| 1 | 9 | Mantis Blades, All is Lost, Industrial Assembly |
| 2 | 6 | Satori, Zetatech Faceplate |
| 3 | 11 | Augmented Negotiators, Appetite for Destruction, Bonnie and Clyde, Over the Edge |
| 4 | 3 | 6th Street Recruits |
| 5 | 3 | Rockn‘ Rockerboy |
| 6 | 6 | Animals Wrecker, Carnage at the Colosseum |
| 7 | 3 | Yorinobu Arasaka: Steel Dragon |
Three face-down Legends make three different games
You don’t know which Legend is coming before your first Call, so you need a plan for every order. The three Legends sit face-down and shuffled in your Legends area, and you don’t get to look at them yourself.*1 A Call costs 1 €$, flips one face-down Legend and triggers its Call effect. You get at most one Call per turn, and you can also use it as a reaction to a rival attack.
After one Call, a specific Legend is face-up with a probability of 1/3, after two Calls 2/3, after three it’s certain. In practice: after two Calls, Smasher is still face-down in a third of your games. Go Solo means you send the Legend itself onto the field as a Unit, and that only works with a face-up Legend. So you can’t lock in a turn-6 Smasher finish.*2
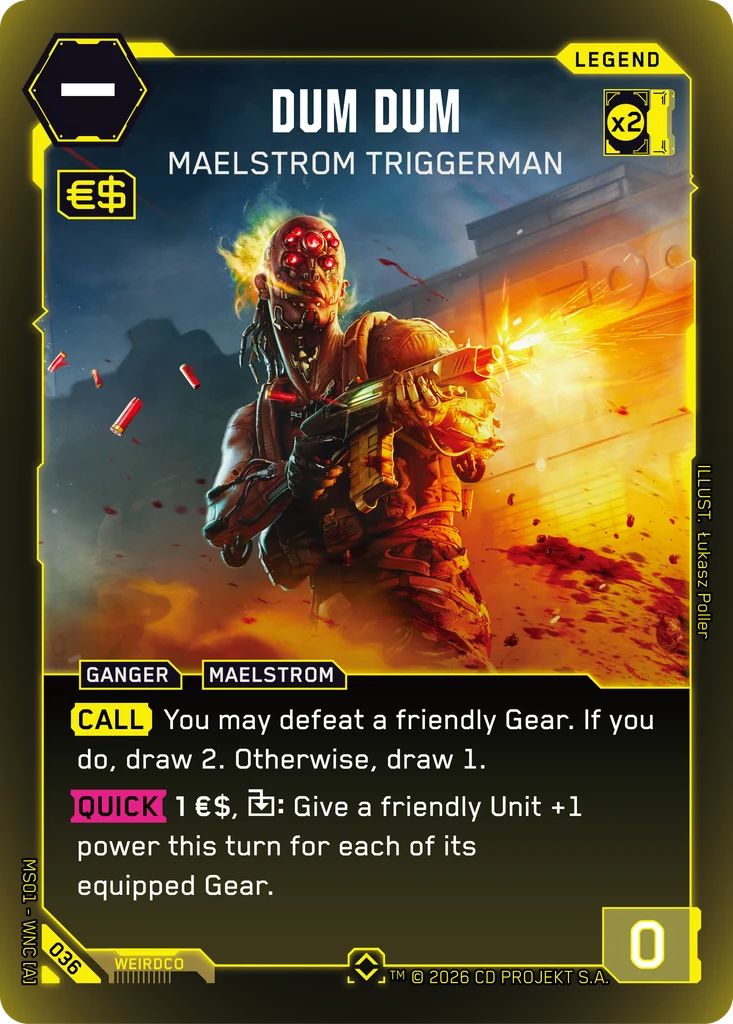
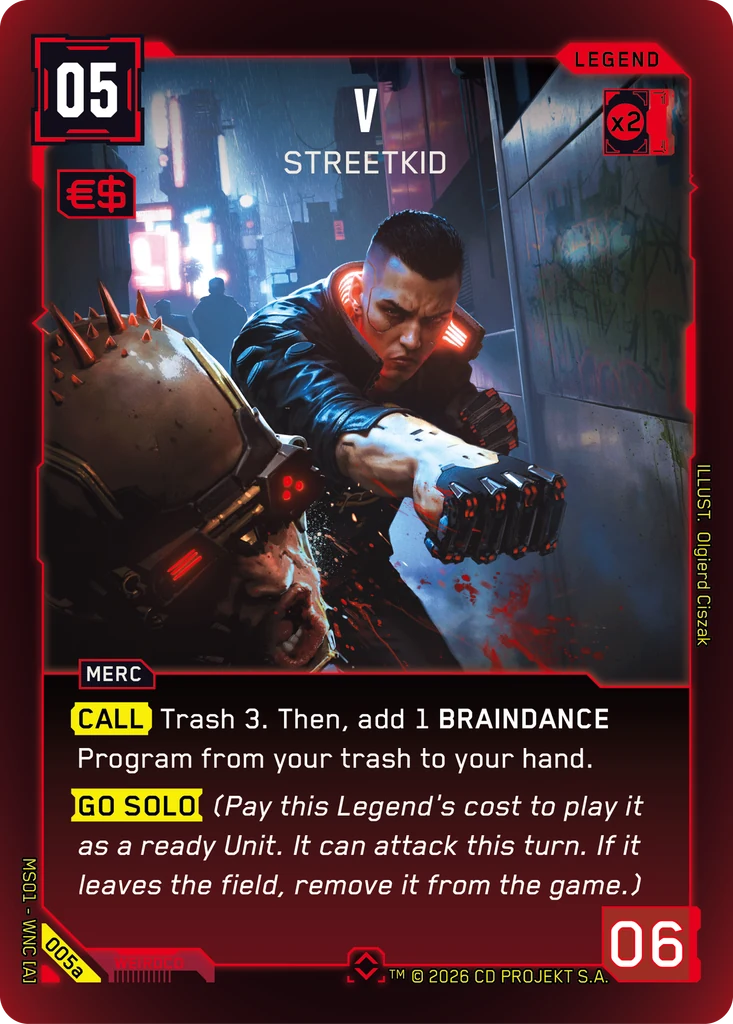
Smasher is the keystone of the deck and V the engine, while Dum Dum works more like a gearbox. In card terms, V’s Call fetches a Braindance back, Dum Dum draws cards and pumps Units with Gear, and Smasher removes a Unit and attacks the same turn. Since the order is out of your hands, the deck has to function with any of the three showing up first.
Smasher shows up first
An early face-up Smasher does nothing for you right now, and it doesn’t hurt you either. The text reads “{Play} Defeat a rival Unit.”, and the official FAQ makes clear that this effect doesn’t fire on a Call: “No, the [PLAY] effect only activates when you play Adam Smasher to the field area.” So that Call is one Eddie spent with no immediate payoff.
It isn’t wasted, though. A face-up Smasher turns into a Gear rack in the Legends area, where you can equip Gear to him safe from Unit removal and later send him to the field at 11 power. Your opponent also now stares at a threat that goes off at 9 €$, and that alone can push them into more careful attacks.
Dum Dum shows up first
An early Dum Dum Call usually nets you exactly one card. The Call text: “You may defeat a friendly Gear. If you do, draw 2. Otherwise, draw 1.” With no Gear of your own in play you draw one card; with Gear you can sacrifice a piece and draw two.
From then on the pump is online. For 1 €$, Dum Dum gives a Unit +1 power per equipped Gear, and you also have to spend Dum Dum for it (exhaust the Legend). The pump is Quick, so it works during your rival’s turn too. That only works if you still have an Eddie left over in their turn. Empty your whole turn and you won’t.
V shows up first
V is the Call that pays off almost every time. The text: “Trash 3. Then, add 1 BRAINDANCE Program from your trash to your hand.” The FAQ says you can take any Braindance Program in your trash, not only one of the three cards you just trashed.
How often does it hit blind? The list runs 9 Braindance Programs (3 each of Bonnie and Clyde, Carnage at the Colosseum and Industrial Assembly). The chance that at least one of them is among three trashed cards is 53.5%. If you played an Industrial Assembly earlier, you never come up empty, since Industrial Assembly is a Braindance itself and is already sitting in the trash. RareTotem stays relaxed about it: “whiffing a fetch ability like this early on can feel pretty bad, but V doesn’t typically care so much”.
On the side, V fills the trash with three cards. If a 6th Street Recruits lands there, your Yorinobu target for turn 4 is already set.
The Eddie formula tells you when Yorinobu and Smasher land
You can know to the exact turn when Yorinobu and Smasher become affordable. Turn N gives you N Eddies plus 3 Legends. That holds as long as you sell one card every turn and haven’t sent a Legend to the field via Go Solo yet, and it’s our own math from the rules.
Here’s why it works. Each turn you can sell exactly one card from your hand, and only if it carries a Sell Tag (the sell icon). That card becomes one Eddie, and every Legend in the Legends area pays 1 €$ on top.*3 All three Legends in this list have a Sell Tag, so they keep paying after they’re flipped face-up.
Heads up if you go first: on turn 1 your two leftmost Legends are spent.*4 The first player has 1 Eddie plus 1 Legend on turn 1, so 2 €$. The second player has 1 plus 3, so 4 €$. From turn 2 on, both run the same row: turn 2 has 5 €$, turn 3 has 6, turn 4 has 7, turn 5 has 8, turn 6 has 9.
Yorinobu costs 7, so turn 4. Smasher costs 9: turn 6. RareTotem gets there too: “The best chances to win you will have will come later in the game, come turn four and onwards.” The math has a catch, though. Every Call costs 1 €$, every Dum Dum pump costs 1 €$ plus Dum Dum. Spend an Eddie on a Call on turn 4 and Yorinobu is one short. After a Go Solo, that Legend is gone as a payment source for good, and from then on you have one Eddie less per turn.
You can almost always sell. Of the 41 cards, 26 have a Sell Tag: all 9 Gear and all 17 Programs. Not a single Unit has one. The chance that your opening hand holds at least two sellable cards is 98.2%.
Your opponent is counting too. The Eddies area is public, and both players can count the cards in it. A face-up Smasher plus 9 visible €$ announces the Go Solo a turn early. Opponents with Riot Shield or MaxTac Suppression Team can wait for exactly that. Small consolation from the FAQ: the Legend you play via Go Solo can help pay its own cost, so Smasher chips in one Eddie of his 9 himself.
Every one of the 41 cards has a job
Card by card: what it’s for, why the list runs exactly that many copies, and when you’re better off selling it. Card texts come from the netdeck.gg card API. “Trio” means the 9 public decks with Smasher, Dum Dum and V, “RRY” the 126 decks with the Legend colors Red Red Yellow. Percentages tell you how many of those decks play a given card.
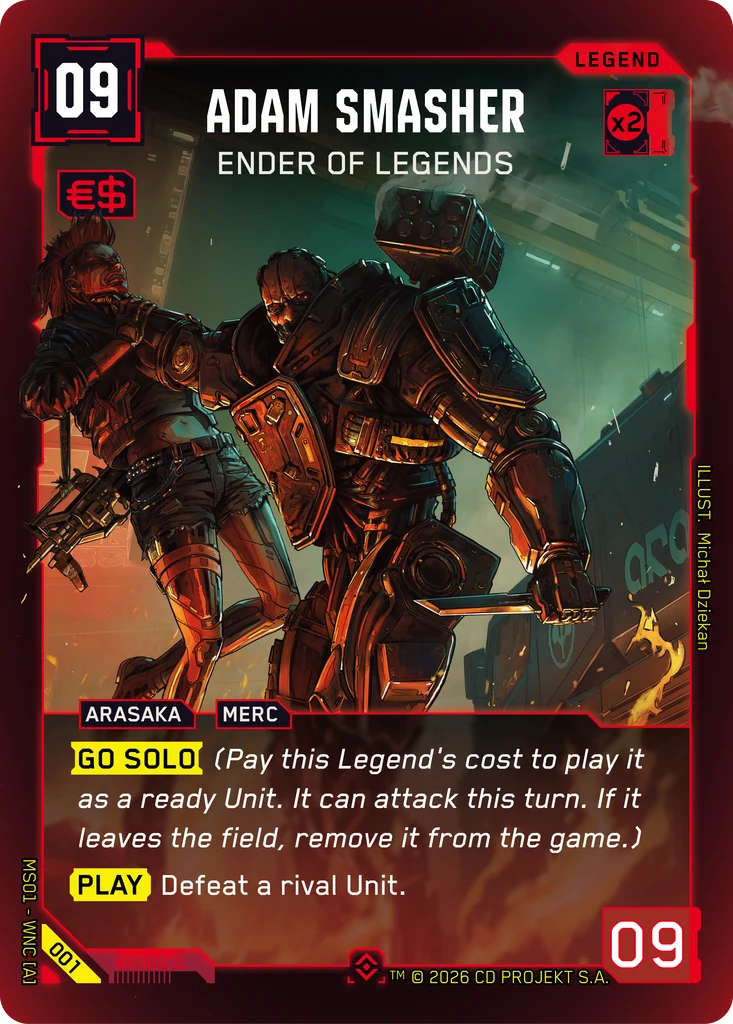
Adam Smasher: Ender of Legends
Smasher ends games. He’s a red Legend with cost 9, power 9, RAM 2 and a Sell Tag. RAM is the color budget: the Legends set a limit per color, and only cards whose RAM value doesn’t exceed that limit can go in the deck. Hitting the field via Go Solo, Smasher defeats a rival Unit and attacks the same turn; per the FAQ, the Play effect triggers on Go Solo. Cost reducers would lower the Go Solo cost as well, but the list has none.
RareTotem puts Smasher in A tier on the channel’s tier list, one step below S, and explains: “spending nine eddies to remove just one unit is not worth it. If you can get him into play, he’s a very good game ender.” The RRY video calls Smasher “a good option to play into the double red mirror match”. (A mirror is the matchup against a deck with the same colors.) Same logic applies to decks with big late Units like Placide.
One line from the tier-list video goes too far: that Smasher can’t be played via Go Solo at all against a Riot Shield in play. Riot Shield only says: “Rivals must pay +2 €$ to use {Go Solo}.” Smasher then costs 11 instead of 9. Expensive, still possible.
Against Riot Shield you have a second route. RareTotem names it in the same video right after: “Thankfully, the new rules allow him to be played to the field to activate his ability without having to go solo.” The FAQ and the card text back that up: a Legend with a number cost can also be played to the field normally, without Go Solo. Per the FAQ: “It enters the field with lag”. Lag means the card can’t attack this turn, and Riot Shield only taxes Go Solo. So Smasher hits the field for 9, his Play effect fires, and he attacks next turn.
Just don’t pay with Smasher himself when you do that. He enters the field in the same orientation he had in the Legends area, so if you paid with him, he lands spent and can be attacked during your opponent’s turn. All of this requires a face-up Smasher. A face-down one can’t be played to the field.*5
One copy, because Legends are unique: duplicate names are banned in the Legends area, and Legends can’t be sideboarded.
V: Streetkid
V is card advantage and a trash-filler, with an emergency body stapled on. Red Legend, cost 5, power 6, RAM 2, Sell Tag. The Call fetches a Braindance Program back, so that’s one extra card in hand. Per the FAQ you take only one, and if fewer than three cards are left in your deck, you trash as many as you can.
RareTotem calls V “mustrun in any iteration of this deck” and ranks V in S tier. By builder data, V is the most common red Legend and sits in all three comparison core lists.
A Go Solo with V brings 6 power for 5 €$, which doesn’t beat a rival Meredith Stout (5 power plus 2 while fighting a Legend, so 7). Per the FAQ, a Legend stays a Legend after Go Solo. The fetch is a Call effect according to the card text, so it doesn’t wait until V is defeated.
Dum Dum: Maelstrom Triggerman
Dum Dum draws you cards and breaks power thresholds. The yellow Legend has no number cost and no power, RAM 2 and a Sell Tag. No number cost means you can’t play Dum Dum as a Unit. Pump only once all your Gear is down, because the bonus locks in on resolution and Gear you equip afterwards doesn’t grow it. Pumping a Unit with no Gear is legal and gives +0.
The pump eats two payment sources: one Eddie and Dum Dum, who can’t pay for anything else that turn. RareTotem describes the upside like this: “His buffing ability is beneficial in similar ways to Dexter’s as he can help get your units up to that 10 power easier and help get you to a power value you need to use Carnage at the Colosseum.” On the tier list, though, Dum Dum only makes B tier, “not nearly as ideal as the higher tier yellow legends, even in gear heavy decks”.
And this trio is a niche pairing. According to ExBurst, Dum Dum pairs with River Ward in 61% of cases, with V in only 13.4% and with Smasher in 11.5%.
3× Augmented Negotiators
Negotiators are your cheapest body and a Blocker that costs your rival cards in hand. Yellow, 3 €$, 2 power, RAM 1, Arasaka and Corpo, no Sell Tag. The text: “{Blocker} (…) / When this Unit uses {Blocker}, a Rival discards 1.” (A Blocker can redirect a rival attack onto itself.) At cost 3 it’s a Yorinobu target, and as an Arasaka Unit it counts for Yorinobu’s draw effect.
89% of trio decks play it, always as a three-of, and it’s one of only two Unit types at cost 4 or less. Against BBG it’s your weakest body: Pyramid Song and Towerfall in their strong modes tuck it under the deck, and Les Élémens takes it as the Unit with the lowest power. That same weakness makes it a lightning rod for 6th Street and Yorinobu. “Chrome Armageddon” swaps all three for Dexter DeShawn: One Last Chance, 3 €$ and 4 power, also a Yorinobu target.
3× 6th Street Recruits
6th Street is your best Yorinobu target. Red, 4 €$, 6 power, RAM 1, no Sell Tag. The text: “When a friendly Unit steals a d6, increase a Gig by up to 6.” The trigger works for any of your Units, not only 6th Street itself, and per the FAQ it fires twice when two d6 get stolen at once.
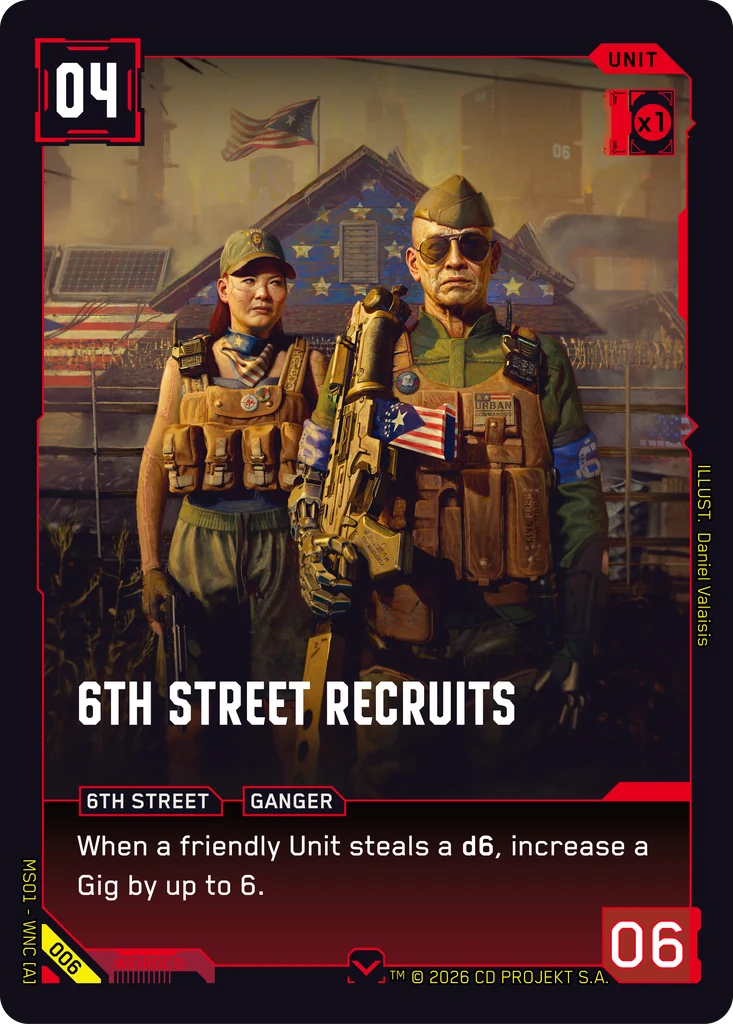
Every trio deck runs three. TimFandango writes: “6th Street Recruits hits all all the damage break points with the included gear”. RareTotem names the card as a good target for Yorinobu: “good targets like six street recruits that can be used to attack the turn they’re played”. With 6 power it survives Towerfall (minus 5, stays at 1) and Pyramid Song (minus 4, stays at 2) without getting tucked. Floor It (minus 1) landing before Towerfall changes that, since 6 minus 1 minus 5 is 0. Then it needs 7 power, which means one Gear. With one Gear (8 power) it doesn’t lose a fight against Lizzy Wizzy or Jacked-In Voodoo Boy even under Pyramid Song, since both have 2 power.
3× Rockn‘ Rockerboy
Rockn‘ Rockerboy is the efficient body that steals two Gigs with one Gear. Yellow, 5 €$, 8 power, RAM 1, Rocker, no Sell Tag, no effect. 8 plus 2 from one Gear makes 10.
56% of trio decks play it, always three. “RED Cyberdeck Wins” and “Adam Smash You” skip it. ripperdeck calls Rockn‘ plus Mantis the “Likeliest route” to 10 power and lists “turn 2.5” for it. By our Eddie formula, the earliest you can drop Rockn‘ is turn 2, when both players have 5 €$; lag wears off at the end of turn 2, and on turn 3 Rockn‘ swings as a 10 with Mantis Blades for 1 €$. ripperdeck’s “2.5” is an average with an undisclosed definition. Don’t read it as a turn number. If you want to swap slots, Rockn‘ is the first candidate.
3× Animals Wrecker
Animals Wrecker steals two Gigs without any Gear and supplies the high power that Carnage at the Colosseum needs. Red, 6 €$, 10 power, RAM 3, no Sell Tag, no effect.
67% of trio decks run it, 2.33 copies on average; among RRY decks it’s 44%. TimFandango’s advice: “Use the Animals Wrecker and Carnage at the Colosseum combo for more sticky units”. Against Placide (10 power) a fight ends in a tie, and on a tie both lose. Give Wrecker one Gear (12) and it beats Placide, plus a rival Yorinobu (9).
3× Yorinobu Arasaka: Steel Dragon
Yorinobu is the core of your plan from turn 4: two bodies for one card. Red, 7 €$, 9 power, RAM 3, Arasaka and Corpo, no Sell Tag. The text: “{Play} You may play a Unit with cost 4 or less from your hand or trash for free. It can attack rival Units this turn. / The first time an ARASAKA Unit is defeated each turn, draw 1.”
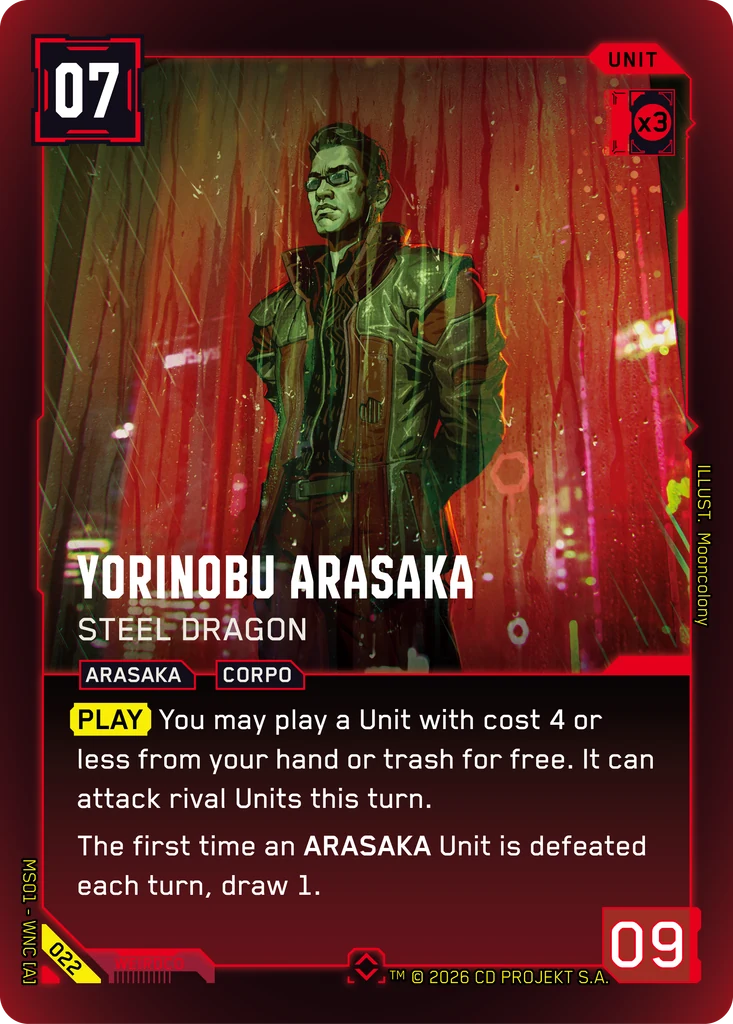
The free Unit can attack right away, but only rival Units, and only spent ones are valid targets.*6 Per the FAQ, it only attacks the Gig area, your opponent’s dice, if it has the Adrenaline keyword. Yorinobu counts himself for the draw effect. One trap: if an Arasaka Unit was already defeated earlier this turn before you played him, you draw nothing more this turn.
Every trio deck runs him, eight of nine as a three-of (2.89 copies on average). RareTotem describes the effect in the BBG video like this: “Being able to play a big nine-power unit and then potentially another big six-power unit that can also make an attack in the same turn it’s played, it’s a monumental shift in tempo”. The site Wild Things writes: “The best card for putting pressure on a BBG player is Yorinobu Arasaka.”
The chance of at least one Yorinobu in your first 10 cards is 57.8%. Yorinobu plus at least one target together come to 47.2%, calculated hypergeometrically, without mulligan and without cards you put into the trash via effects. “RED Cyberdeck Wins” gets to 9 targets in 40 cards with three Meredith Stout (cost 4) and thus to 55.2%. The reference list has only six targets, same as “Chrome Armageddon” and the ripperdeck variant, and since it runs 41 cards instead of 40, its density is the lowest of the bunch. The trash has to make up the rest.
Don’t mix him up with Yorinobu Arasaka: Embracing Destruction. That one is a Legend, D tier at RareTotem, and has no place in this list.
Gear: protection and a calculator
In this list, Gear decides how many Gigs you steal per attack. Gear power counts fully toward the Unit. How much a Unit steals depends on its power: 1 to 9 power steals one Gig, 10 to 19 steals two.*7 All three Gear give +2, which sets the list’s thresholds: 6th Street needs two Gear for 10, Rockn‘ needs one, Yorinobu hits 11 with one, Animals Wrecker sits at 10 without any.
Gear also protects. Maman Brigitte can only tuck an unequipped Unit, so a single Mantis Blades for 1 €$ makes your Unit immune to it. Gear can also go on face-up Legends in the Legends area; the FAQ entry on Royce says “Yes, you can equip face-up Legends in the Legends area.” When the Legend moves to the field via Go Solo, the Gear moves along and stays equipped.*8
Against BBG, our rule-of-thumb number is 11. Floor It takes 1 power off a Unit, a 10-power Unit drops to 9, and suddenly it steals only one Gig. Yorinobu with one Gear sits at 11 and shrugs that off.
3× Mantis Blades
Mantis Blades is your cheapest +2, at 1 €$. Red, RAM 1, Cyberware, Sell Tag, with no extra text and no FAQ entry. It makes a Unit immune to Maman Brigitte and gets Rockn‘ Rockerboy to 10. Every trio deck runs three; among RRY decks it’s 94% (2.95 copies on average), among all RR decks 88%.
3× Satori: Sword of Saburo
Satori draws you a card for every fight you win. Red, 2 €$, +2, RAM 1, Arasaka and Weapon, Sell Tag. The text: “When this Unit wins a fight against a rival Unit, draw 1.” Per the FAQ that also applies when you defend successfully; on a tie you draw nothing.*9
Every trio deck plays Satori, RRY decks at 90%. A Unit Yorinobu plays for free enters without Gear, and on turn 4 there’s no Eddie left for Satori after Yorinobu. If 6th Street gets Satori later, it has 8 power, beats a small spent Unit and draws you a card on the way.
3× Zetatech Faceplate
Faceplate is the reason yellow makes it into the list. Yellow, 2 €$, +2, RAM 2, Cyberware and Zetatech, Sell Tag. The text: “When this Unit or Legend is spent, adjust a Gig by up to 1. Then, if you control 3 or more Gigs with different values, draw 1.”

On an attack, per the FAQ, the effect triggers before your opponent can respond. If you equip Faceplate to a face-up Legend and pay with that Legend, Faceplate resolves after the card is played.*10 Put it on a face-up Legend and Faceplate triggers every turn you pay with it. No attacking Unit needed.
RareTotem calls Faceplate “an amazing card that Red Red Yellow has access to” that also helps you “get additional card draw”. The idea behind that: with the nudged Gig you break up Hanako’s value pairs (two Gigs with the same value, which Hanako draws cards for) and keep your opponent’s d4 off the minimum. The d4 is the four-sided die, the minimum is the lowest Gig value. Elsewhere RareTotem says: “yellow gives us a very potent gear card that throws a wrench into BBG’s plans”. Every trio deck plays Faceplate, RRY decks at 92%.
3× All is Lost
All is Lost puts a Unit in your hand and dumps Braindance cards into the trash. Red, 1 €$, RAM 2, Zetatech, Sell Tag. The text: “Trash 3. Add a Unit from among them to your hand.” If the effect hits a Unit, per the FAQ you have to take it into your hand.*11
Most of the time it nets you a Unit in hand. In 75.6% of cases at least one Unit is among the three cards; in 29.9% there are at least two, so one stays in the trash. A Yorinobu target shows up in 38.6%. (Approximations, using the full 41-card deck.) In the video, RareTotem says: “You have three copies of [All is Lost] to help throw some units into your trash pile.” (The auto-transcript spells the card “Alla’s Lost”.) Half right at best. You’re forced to take the Unit, so the card mostly fills the trash with non-Units. What it really gives you is one more Unit in hand for Yorinobu to play from there on turn 4, plus Braindance food for V. 78% of trio decks play All is Lost; “RED Cyberdeck Wins” runs zero.
3× Industrial Assembly
Industrial Assembly is your turn-1 play and lifts Gigs to 8 and up. Red, 1 €$, RAM 1, Arasaka and Braindance, Sell Tag. The text: “Increase a Gig by up to 4. If you control a Gig with 8+ value, draw 1.” Per the FAQ the card can also raise one of your opponent’s dice.*12 Increasing by 0 is allowed, but doesn’t count as adjusting.
The card has four jobs: turn-1 play, an 8-value Gig for the Carnage discount, Braindance food for V and, against BBG, lifting the rival d4 off the minimum. In that matchup it often belongs on your opponent’s die rather than your d12. 89% of trio decks play it (2.50 on average), 77% of RRY decks. The ripperdeck variant runs just one.
A few of the Programs and Gear come in the starter decks too. Per the card API, Mantis Blades, Satori, Industrial Assembly and Over the Edge have prints in the Embracing Power starter deck, and Zetatech Faceplate is in The Heist starter deck. How many copies each starter contains, we didn’t check.
2× Appetite for Destruction
Appetite steals you a Gig when your Unit wins a fight by a wide margin. Red, 3 €$, RAM 4, Ganger, Sell Tag. The text: “The next time a friendly Unit wins a fight by 3+ power this turn, it also steals a Gig.” You pick the Unit when you play the card.*13 Per the FAQ it steals even when it wins but can’t defeat, and that steal counts for your own steal triggers.
RareTotem explains the two copies like this: “it includes two copies of Appetite for Destruction to kill two birds with one stone by using our huge units to take out our rivals units and steal gigs at the same time.” 89% of trio decks play the card (2.12 on average), ripperdeck runs three, “Chrome Armageddon” none. At RAM 4 it maxes out the entire red budget, and it needs a spent rival Unit or a Blocker plus a 3-power gap. Situational, in other words. When you sideboard, it’s the first card we’d take out.
3× Bonnie and Clyde
Bonnie and Clyde clears small Units, often two at once. Red, 3 €$, RAM 3, Braindance, Sell Tag. The text: “Defeat a rival Unit with power 4 or less. You may defeat 2 instead if a Rival controls at least 2 Gigs more than you.” You can also choose just one.
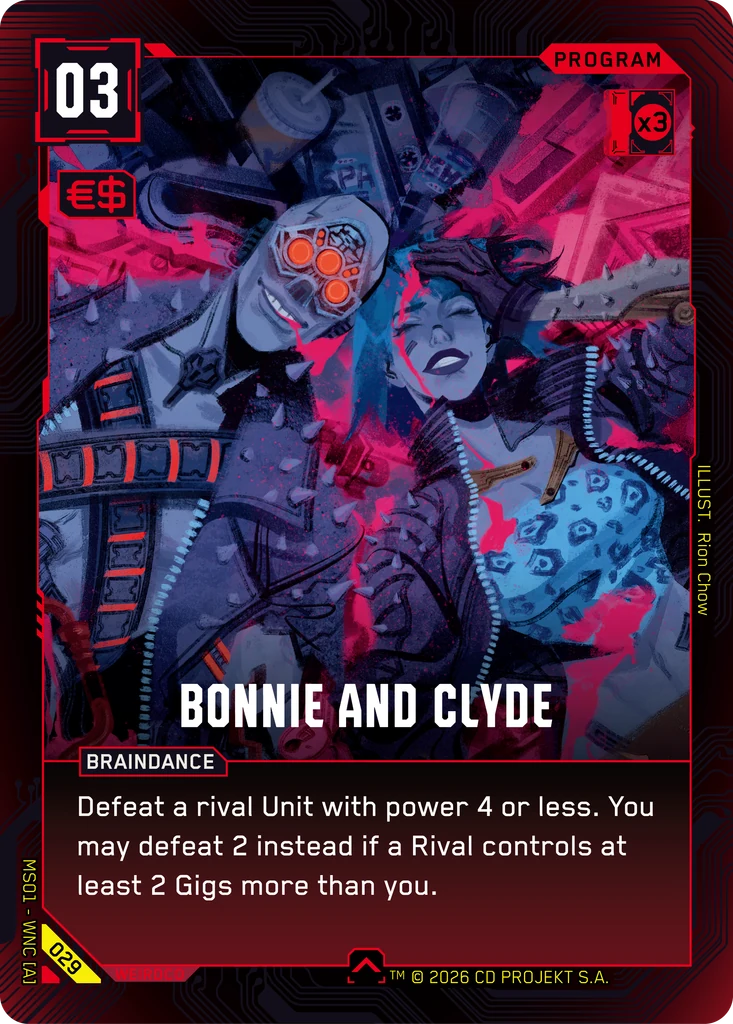
RareTotem: “Bonnie and Clyde is amazing for the many smaller units that BBG typically plays.” And in the BBG video: “if you’re behind on gigs, which you’ll most likely be early on, you’ll snipe two of those units off the board with one cheap brain dance.” Targets in BBG and Judy by card data: Lizzy Wizzy (2), Jacked-In Voodoo Boy (2), Maman Brigitte (3), Rita Wheeler (4), Field Operator (2). Every trio deck plays the card, eight of nine as a three-of (2.89 copies on average), and it’s the favorite target for V’s Call.
3× Over the Edge
Over the Edge is your best sell card early and your answer to everything late. Red, 3 €$, RAM 2, Merc, Sell Tag. The text: “Defeat a Unit with power equal to or less than the value of a friendly d20.” Without a d20 of your own you can still play it; it just does nothing. And the d20, your twenty-sided die, only gets rolled in once no other Gig dice are left in your fixer area (the pool you bring your dice into play from).*14
RareTotem says Over the Edge and Carnage “are fantastic, but are used only in the late game”. 56% of trio decks run Over the Edge (2.40 on average). Late in the game it’s the only answer that doesn’t care about the power of your own Units. In a pinch it can even defeat your own 6th Street so it sits in the trash for Yorinobu, though that costs 3 €$ and a card.
3× Carnage at the Colosseum
Carnage clears almost any Unit as long as you have a bigger one. Red, 6 €$ minus discount, RAM 3, Braindance and Extreme, Sell Tag. The text: “Play this Program for -1 €$ for each friendly Gig with 8+ value, to a minimum of 1 €$. / Defeat a rival Unit with less power than a friendly Unit.” Per the FAQ the discount doesn’t change the card’s cost.
How cheap Carnage gets comes down to your dice. Gig values of 8 and up exist only on the d8 (exactly 8), the d10, the d12 and the d20. At best, with four of those dice, Carnage costs 2 €$. You only reach 1 €$ with stolen rival dice on top. RareTotem: “Carnage at the Colosseum is also highly effective in this deck due to the presence of so many big units.” Every trio deck plays the card, eight of nine as a three-of (2.89 copies on average), and after Bonnie it’s V’s second-favorite target.
Nine combos and where each one breaks
For every combo you get the trigger, the result and the condition that breaks it, so at the table you know when not to bother.
Yorinobu pulls 6th Street out of the trash
This combo puts fifteen power on your board on turn 4, with an attack on top. Beforehand, 6th Street Recruits lands in the trash, say from a lost fight or V’s Call, or it’s in your hand. On turn 4 you play Yorinobu for 7 €$, put 6th Street onto the field for free, and 6th Street attacks a spent rival Unit.
RareTotem: “This puts two sizable threats on your board that cannot be targeted by Towerfall or Pyramid Song on their own.” The math checks out, since neither minus 4 nor minus 5 brings 9 or 6 down to 0. It falls apart in four spots: no target with cost 4 or less in hand or trash; no spent rival Unit, so the free Unit just stands there; an Eddie already burned on a Call on turn 4; or BBG, which tucked your Units under the deck and left the trash empty.
V fetches a Braindance back
With this chain you cast a Bonnie or Carnage twice for one extra Eddie. You play Bonnie and Clyde or Carnage, and the card goes to the trash. Later you Call for 1 €$, flip V, trash three cards and take the best Braindance from your trash into your hand.
The blind Call only hits V one time in three on the first try. With no Braindance in the trash yet, you’re relying on luck with the three trashed cards (53.5%). Call too early and you’ll often find nothing better than Industrial Assembly, the weakest Braindance, though that same turn-1 Industrial Assembly is also your insurance that V never whiffs completely.
Dum Dum draws off Gear
With a sacrificed Gear you draw two cards instead of one. When you Call Dum Dum, you defeat one of your own Gear and draw two. Worth it with Gear on a Unit that’s lost anyway, or spare Gear on a Legend whose Go Solo isn’t coming anymore. The Gear goes to the trash, mind you, and this list has no way to get Gear back, with neither Viktor Vektor nor The Heist in it.
The Call also works as a reaction to a rival attack. When one of your spent Units gets attacked and will lose anyway, flip Dum Dum, sacrifice its Gear, draw two. Without Gear in play you get only one card, and a rival Detonate can take the Gear away first.
Dum Dum pumps over a threshold
The pump saves your 10 threshold against Floor It or decides a close fight. A 6th Street with Mantis and Satori has 10 power. Dum Dum gives +2 for 1 €$ plus the Legend itself, making 12. That also helps with Carnage, which needs one of your Units to have more power than the target. RareTotem names exactly that case.
The bonus stays at its value on resolution. It doesn’t happen if Dum Dum is still face-down, if you have no Eddie left during your rival’s turn (your Eddies only ready at the start of your own turn) or if the Unit has no Gear.
Faceplate on a face-up Legend
A Gig nudge and a card in many turns, without attacking at all. You equip Faceplate to a face-up Legend for 2 €$. Every time you spend that Legend to pay or for a Spend effect, you adjust a Gig by 1, and with three or more different Gig values you draw a card.
On Dum Dum, Faceplate also triggers on the pump. On Smasher, Faceplate goes along on Go Solo and adds +2 power. If Smasher helps pay his own Go Solo cost, the FAQ on Zetatech Faceplate covers paying with an equipped Legend. Faceplate triggers after the card is played (“After. Play the card first, then adjust the Gig.”), and the Gear stays equipped. Smasher has no separate FAQ entry. Detonate can knock the Gear off the Legend, and with fewer than three different Gig values you get the adjustment but no card.
Smasher with pre-installed Gear
Smasher arrives with 11 power and steals two Gigs. It starts with a face-up Smasher: one turn ahead you equip Mantis Blades to him in the Legends area (1 €$). The next turn you play him via Go Solo for 9 €$, defeat a rival Unit with the Play effect and attack the Gig area with 11 power. Per the FAQ, Go Solo also works on the same turn as the Call and with a spent Legend.
Plenty can break it. Smasher might still be face-down (a third of your games after two Calls). Riot Shield in play makes him cost 11, and with MaxTac Suppression Team in play the Go Solo Legend can’t attack, per the FAQ. A Blocker can redirect the attack, Detonate can remove the Gear first, or Take Control turns two stolen Gigs into one. And it has a price: afterwards Smasher is gone as a payment source for good, and if he’s defeated or tucked under the deck, he’s out of the game.
Gig values of 8 and up
High dice of your own make Carnage cheaper and turn Industrial Assembly into a draw card. Industrial Assembly (+4) or the 6th Street trigger (+6 on a stolen d6) lifts your own d8, d10, d12 or d20 to 8 or more. Each of those dice knocks one Eddie off Carnage.
If you roll in a d12 on turn 1, it shows at least a 4 with 75% and lands at 8 or more with Industrial Assembly. On the d8 it’s 62.5%, and the d8 tops out at exactly 8. The weak spot: the attacker chooses which Gigs to steal, and high dice are a favorite target. Hanako can swap them, too. Against BBG your own high dice carry one more drawback (see the BBG section).
Negotiators block under Yorinobu
Every Negotiators block costs your opponent a card from hand, and with Yorinobu on the field it can also net you a card. They attack, Augmented Negotiators blocks, and per the card text they discard. That happens on every block, Yorinobu or not. Yorinobu only draws you a card if Negotiators loses the fight and gets defeated, and only if it’s the first Arasaka Unit defeated this turn.
Only a ready Unit can block; a spent one can’t. Against an attacker with less than 2 power, Negotiators wins. Then you draw nothing off Yorinobu, but you don’t lose a Unit either. This even turns Live with the Aftermath from River Ward lists (“Each player defeats one of their Units”) into an upside, since you sacrifice Negotiators and draw off Yorinobu.
Appetite with a big body
A big attacker plus Appetite steals you a Gig in a fight against a Unit. Animals Wrecker (10) attacks a spent Lizzy Wizzy (2), with Appetite cast on Wrecker beforehand. Won by 8, and a Gig comes along. Yorinobu’s free Unit can do it too, but that’s 7 plus 3 €$, so turn 7 at the earliest.
No spent target, no effect. If your opponent redirects with a Blocker, the fight against the Blocker counts, and Appetite only triggers at a 3-power gap. If Reboot Optics (from Judy lists) prevents the defeat, per the FAQ your Unit still steals.
Three turns, counted out
This is the Eddie formula at the table, three turns counted down to the last Eddie, including where each one tips over.
Turn 1 on the play with 2 €$
Going first, you turn two Eddies into a card and a Call. Two Legends are spent, one is ready. You have 7 cards in hand and rolled in a d12 showing 5. In hand: Industrial Assembly, Over the Edge, Mantis Blades, 6th Street Recruits, Augmented Negotiators, Satori and Bonnie and Clyde.
Sell Over the Edge, which is dead until the d20 anyway. That’s one Eddie, and with the ready Legend you have 2 €$. Industrial Assembly for one Eddie lifts your d12 from 5 to 9. You control an 8-value Gig, so you draw a card. Industrial Assembly now sits in the trash as a Braindance. With the second Eddie you Call. V trashes three cards and fetches at least Industrial Assembly back; Dum Dum draws you a card; Smasher does nothing yet, but from now on you have a Gear rack.
You end with 6 cards in hand (7 minus the sell minus Industrial Assembly plus one draw), maybe one more depending on the Call. The plan breaks if the d12 shows only 1 to 3, which happens 25% of the time. No card then, and you’d rather hold Industrial Assembly. Against BBG: on your turn 1 as first player, your opponent has no Gig at all yet, so Industrial Assembly finds no rival target there. On your second turn (on the draw that’s already turn 1), your opponent has exactly one rolled Gig. If their d4 shows 1, you put Industrial Assembly on that d4. That only takes away Pyramid Song’s strong mode for the moment: with Trust No One (1 €$), BBG can drop the d4 again at any time. The draw then often falls away if you don’t have an 8-value Gig yourself yet.
Turn 4 with Yorinobu and a free 6th Street
15 power hits the board this turn, and your opponent loses a body. You sold one card on each of turns 1 to 4, so you have 4 Eddies. Add 3 Legends; V has been face-up since turn 2 and keeps paying thanks to the Sell Tag. 6th Street Recruits is in your trash, put there by V’s Call on turn 2. Your opponent attacked with a 4-power Unit on their turn, and it’s still spent.
Yorinobu costs 7 €$, so all 4 Eddies and all 3 Legends. His Play effect pulls 6th Street out of the trash for free. 6th Street (6) attacks the spent 4-power Unit and wins, and the rival Unit goes to the trash. Yorinobu himself has lag and stays put.
Calling on top of all this would take 8 €$, so forget it. With no spent rival Unit, 6th Street just stands there, because it isn’t allowed to hit the Gig area. Against BBG, Les Élémens tucks 6th Street next turn as the Unit with the lowest power, and Towerfall drops both to 4 and 1 for the BBG turn without removing them. Spent Units then lose every fight against bigger attackers. Worth remembering: a rival Bonnie and Clyde can’t hit 6th Street at all, the cap being 4 power. Trash food comes from your own effects or from lost fights.
Turn 6 with Smasher as the finisher
Two Gigs for you, and your opponent’s strongest Unit is gone. You have 6 Eddies and 3 Legends, so 9 €$. Smasher was flipped on turn 3, and on turn 5 you equipped Mantis Blades to him (one Eddie out of that turn’s 8 €$). Your opponent has Placide (10 power) on the field, three Gigs and no ready Blocker.
Go Solo costs 9 €$: 6 Eddies, V, Dum Dum and Smasher himself. Smasher enters the field ready, Mantis stays on, for 11 power. The Play effect defeats Placide, and the card goes to your opponent’s trash. Then Smasher attacks the Gig area with 11 power and steals two Gigs. From turn 7 on you only have two Legends left as payment sources, so turn 7 gives 7 plus 2: 9 instead of 10.
What breaks it: Riot Shield (11 €$, turn 8 at the earliest with 8 Eddies and 3 Legends), on MaxTac (no attack), on Take Control (two Gigs become one) or on a ready Blocker. Floor It (11 down to 10) costs you nothing, and that’s exactly what the 11 is for. Against Riot Shield you play Smasher without Go Solo for 9. Placide dies all the same; the attack just waits until next turn. Pumping with Dum Dum as well (+1 for Mantis) needs one more Eddie and Dum Dum as a separate source, which makes 11 sources and turn 8 at the earliest. Only worth it if 12 instead of 11 decides a fight.
The mulligan almost always pays off
A mulligan costs you no card here, since the new hand has six again. The opening hand is 6 cards, you can mulligan exactly once, and the first player decides first.*15 Because the whole hand gets shuffled back, both hands are independent, and the chance with the mulligan option is 1 minus (1 minus p) squared.
| Criterion (41 cards, 6-card hand) | 1st hand | with mulligan |
|---|---|---|
| at least 1 Unit (15) | 94.9% | 99.7% |
| at least 1 Unit costing up to 4 (6) | 63.9% | 87.0% |
| at least 1 Unit costing up to 5 (9) | 79.8% | 95.9% |
| at least 1 Gear (9) | 79.8% | 95.9% |
| at least 1 Yorinobu (3) | 38.6% | 62.3% |
| at least 2 Sell Tag cards | 98.2% | – |
| no Unit | 5.1% | – |
| 4 or more Units | 11.7% | – |
| at least 1 Unit up to 4 and at least 2 Sell Tag cards | 62.1% | 85.7% |
| at least 1 Unit up to 4, at least 1 Gear, at least 2 Sell Tag cards | 48.3% | 73.3% |
| 1 to 3 Units and at least 3 Sell Tag cards | 83.2% | 97.2% |
To show the math once: the chance that none of the six cheap Units is among your 6 cards is C(35,6) divided by C(41,6), so 36.1%. With a cheap Unit it’s 63.9%, and with the mulligan option 1 minus 0.361 squared, so 87.0%.
For the 40-card variant, ripperdeck works with “OPENER 39% keepable hand · 63% after a mulligan” and “FIRST UNIT turn 2.5 … in 74% of games” for a Unit costing 3 or less. They don’t say what counts as “keepable”, so those numbers don’t compare directly with ours.
Our keep rules come straight from the table. Keep any hand with 1 to 3 Units, at least one of them costing up to 5, plus at least 3 Sell Tag cards. With three Units or fewer the Sell Tag condition takes care of itself, because every non-Unit in the list carries a Sell Tag. That covers a good two thirds of opening hands (68.2%). The 83.2% in the table is for 1 to 3 Units and at least 3 Sell Tag cards, without the cost-up-to-5 condition. Ship a hand with no Unit (5.1%), because nothing happens there until turn 4. Ship one with 4 or more Units (11.7%) too: Units have no Sell Tag, you only get to sell one card per turn, and the curve clogs.
A hand with Yorinobu, All is Lost and a cheap Program is a keep even without a small Unit. By our approximation All is Lost finds a Unit 75.6% of the time, and Yorinobu plays it from hand on turn 4. Against BBG, get stricter and ship any hand without Gear and without a Yorinobu target. RareTotem’s advice for that matchup is to count early Units as lost anyway; the turn-4 packages are what matter.
On the play, 1-€$ Programs count for more, since you only have 2 €$ on turn 1. On the draw you have 4 €$, enough for 6th Street on turn 1 or Negotiators plus Mantis. No source says whether the list would rather go first or second. Against BBG, though, RareTotem advises going first whenever you can. The tournament rules only state that whoever loses game 1 chooses in game 2.
Against BBG, where your Units end up decides the game
Beating BBG means knowing exactly where its removal stops and building Units no single card can clear. Our full guide to the other side is the BBG deck guide.
RareTotem is careful here. The video calls RRY the “first counter meta pick”, sure, but also “still a difficult road to victory at times”. According to RareTotem, you should expect every Unit from turn 1 or 2 to leave the board again almost for sure, through Pyramid Song or another card whose name the auto-transcript garbles beyond recognition. The video’s tip is to wait until turn 3 and drop two 3-cost Units at once, “but this is difficult to achieve at times and opens you up to be hit with a tower fall.” The plan behind it: “If you can manage to put a few bodies on the board and get your nobo on the field, you will likely win the game”, where “nobo” means Yorinobu.
Wild Things takes a dimmer view of the matchup: “if BBG survives turns 1–4 and bounces all of RRY’s big threats, the match swings drastically in BBG’s favor”. And elsewhere: “sometimes getting units into your trash in this matchup is difficult”. Wild Things doesn’t say why. The card texts do. BBG removes almost exclusively by bottom-decking (putting cards under the deck) with Pyramid Song, Towerfall, Les Élémens, Maman Brigitte and Placide. Bottom-decked Units never reach the trash, and that’s exactly where Yorinobu looks for food. RareTotem’s line “your Anobu will just bring them back turn four like always” (said about other matchups; “Anobu” is the auto-transcript’s Yorinobu) only holds against BBG for Units defeated in combat or by your own effects.
Wild Things also describes this BBG tactic: “Some BBG players simply concede the early game gig-steals to their opponent in an aggro matchup, only to then stall them to the late-game where Placide deletes their board and takes it all back in 1 swing.”
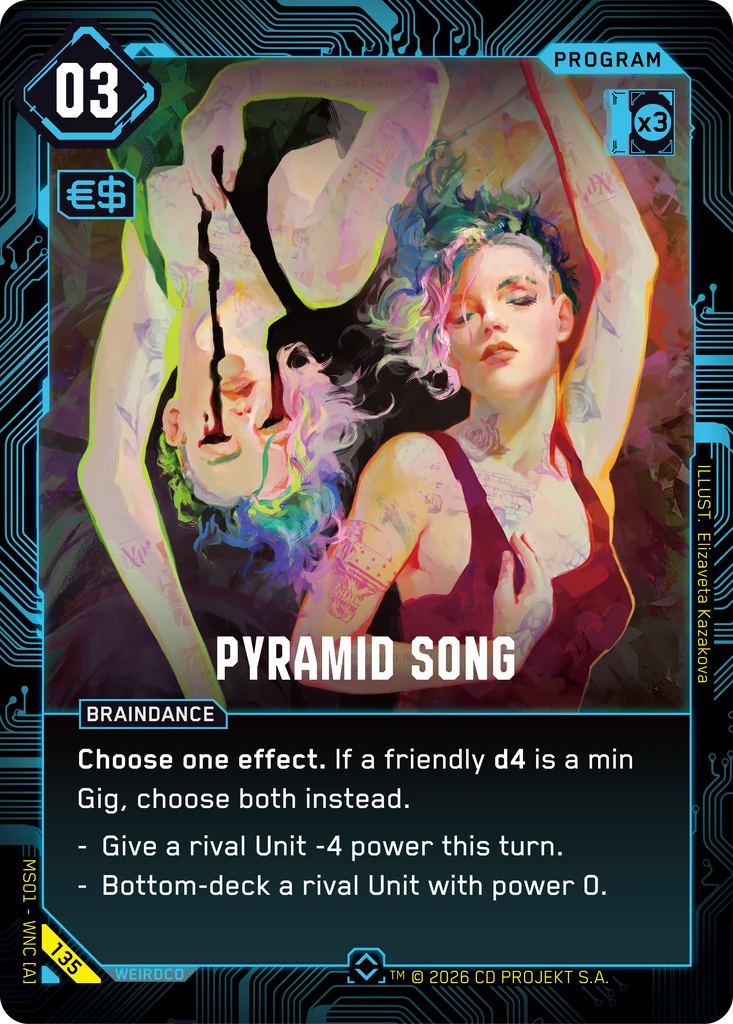
Here’s BBG’s removal stacked against the power values in our list. Negative power counts as 0.*16
| Rival card | Limit | What survives in our list |
|---|---|---|
| Pyramid Song | minus 4 to one Unit; with a d4 on the minimum, also bottom-deck at power 0 | everything except Negotiators (2 to 0); 6th Street stays at 2 |
| Towerfall | minus 5 to all; if the BBG player has less Street Cred, also bottom-deck everything at power 0 | everything except Negotiators; 6th Street without Gear stays at 1 |
| Les Élémens | bottom-deck the Unit with the lowest power | always hits a Unit; Negotiators acts as the lightning rod |
| Maman Brigitte | bottom-deck an unequipped Unit (discard 2 Programs) | any Unit with at least one Gear |
| Take Control | one fewer stolen Gig | 10+ power still steals one |
| Floor It | minus 1 power | 11+ holds the two-Gig threshold |
| Placide | on play and attack: discard a Program, bottom-deck a Unit; 10 power | answers: Smasher’s Play effect, Carnage with a Unit above 10, Over the Edge with a d20 at 10+, Wrecker plus Gear in combat |
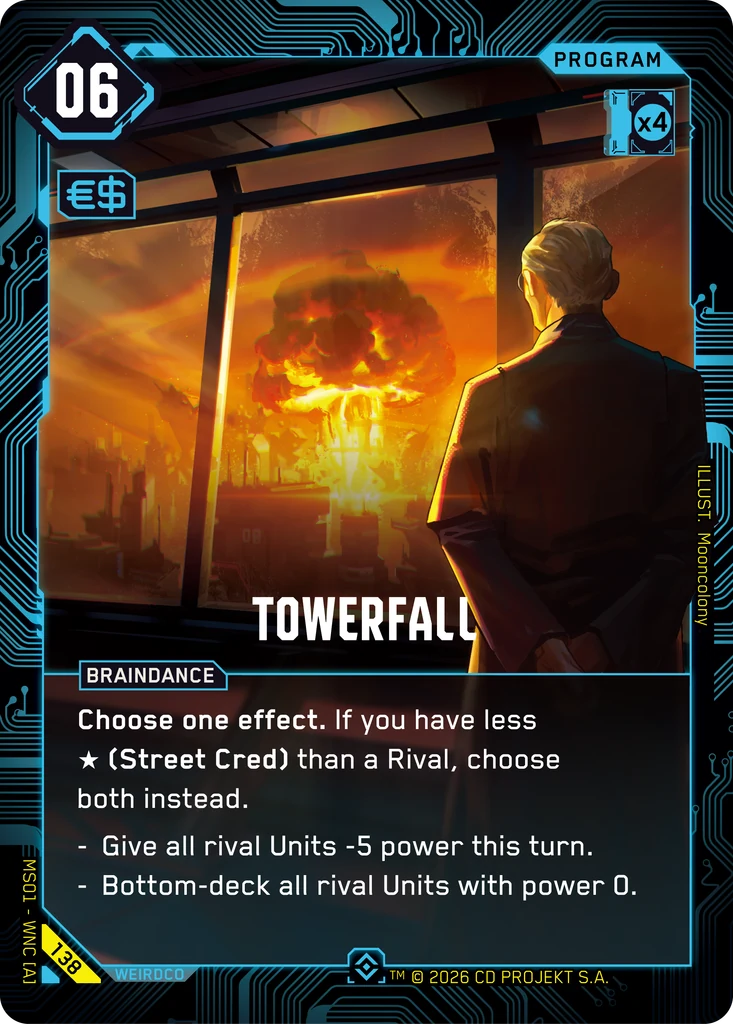
Every Unit you want to keep gets at least one Gear, which protects against Maman Brigitte and buys a buffer against Pyramid Song. Keep your opponent’s d4 off the minimum as well, with Faceplate (plus or minus 1) or Industrial Assembly (raise only). That makes Pyramid Song’s strong mode harder to reach, but only for the moment. BBG can reset the d4 with Trust No One (1 €$) and draws a card doing it. You cost your opponent tempo and a card; you can’t switch the mode off. RareTotem recommends the same: change Gig values to break Hanako’s value pairs and lift the d4 off the minimum “to reduce the effectiveness of cards like Alt Cunningham and Pyramid Song”.
Keep an eye on your Street Cred.*17 Towerfall picks both modes when the BBG player has less Street Cred than you. Every high die of your own and every stolen Gig raises your Street Cred. Industrial Assembly on your opponent’s d4 kills two birds: the d4 leaves the minimum, and their Street Cred goes up.
Collect Yorinobu targets in hand rather than the trash, since bottom-decking fills no trash. Same reason All is Lost gets weaker here: it only leaves a Unit in the trash when it hits two or more (29.9%). Save Smasher as your answer to Placide. RareTotem: “If a lot of the BBG decks you encounter are using placed, Adam Smasher Ender of Legends is a great legend to use to close games out”, where “placed” is the transcript’s Placide. If BBG plays Hanako: per the FAQ a swap isn’t a steal, Hanako draws per value pair at the start of her controller’s turn, and Faceplate breaks those pairs.
Our sideboard plan for BBG: three Meredith Stout in, two Appetite for Destruction and one Augmented Negotiators out. Meredith triggers as soon as your opponent adjusts or swaps one of your Gigs, say with a Hanako swap or by playing Trust No One on one of your Gigs, and fetches you a card from the trash. With 5 power she survives Pyramid Song (down to 1), but in Towerfall’s double mode she drops to 0 and goes under the deck. RareTotem says about Meredith: “She’s also not easily removed with Pyramid Song … just expect her to get removed at some point.” Appetite needs fights against spent Units, and BBG doesn’t attack much. Bonus: at cost 4, Meredith is a Yorinobu target.
River Ward, Judy and the mirror each need their own answer
Each of these three decks wants a different sideboard card. The rival lists come from the ExBurst consensus; those are community decks, not tournament lists.
River Ward Gear
Against River Ward, it’s all about which rival Gear Detonate can reach. There’s a separate Gear guide for that deck. In the ExBurst consensus (590 River Ward lists, consensus from 535, as of October 14, 2026), Faceplate shows up in 86%, Adrenaline Converter in 57.6, Gorilla Arms in 55.5, Augmented Negotiators in 52.7, Mandibular Upgrade in 51.8, Safety Override in 43.6, The Heist in 43.4, Live with the Aftermath in 42.8, Bootleg BSS in 39.1 and Secondhand Bombus in 38.9%. Adam Smasher: Metal Over Meat appears in 24.1%. The partner Legends are Dum Dum (34.8%) and Royce (26%).
River Ward also drops Gear on your turn: “{Quick} {Spend} Play a Gear with cost 2 or less from your hand for free.” Adrenaline Converter has Adrenaline when a Rival controls at least 2 more Gigs, so stay exactly one Gig ahead. Go two Gigs up and you’ve unlocked your opponent’s instant attacks. Safety Override turns your won fight into a trade: “The next time a friendly Unit loses a fight this turn, defeat the opposing rival Unit.”
Metal Over Meat (“{Play} Defeat all other Units.”, 15 power, 9 €$) defeats your Units instead of tucking them. They land in the trash and become Yorinobu food, and Yorinobu pulls one back afterwards. TimFandango’s short recommendation: “Heywood against Gears”.
Detonate (“Defeat a rival Gear with power 2 or less.”) hits Faceplate (2), Mantis (2), Mandibular (0) and Kiroshi (1), but not Gorilla Arms (3), Adrenaline Converter (3) or The Relic (3). Heywood Ripperdoc can defeat a Gear with no power cap. Our sideboard: two Detonate and one Heywood in, two Appetite and one Industrial Assembly out. Detonate is Quick, which makes it a combat reaction for one Eddie. Heywood handles the 3-power Gear and leaves an 8-power body behind. Appetite is unreliable against Blocker Gear like Mandibular and against Safety Override, and Industrial Assembly is the weakest Braindance here.
Judy mono-blue
Against Judy you hold Bonnie and Clyde for the Lizzy Wizzy turns, since almost every Judy Unit sits under Bonnie’s cap. The numbers from the ExBurst consensus (382 Judy lists, consensus from 298) cover all Judy lists; there’s no separate consensus for mono-blue, even though lists like “Mono Blue Mox” and “Mono Blue BD” exist. Lizzy Wizzy shows up in 87.9%, Chrome Reverie in 86.6, Trust No One in 85.9, Pyramid Song in 84.2, Placide as a two-of in 77.5, Three Mouths in 73.8, Towerfall as a two-of in 64.8, Les Élémens in 64.4, Floor It in 59.1, Maman Brigitte in 57.7, Rita Wheeler in 55.4, Nocturne in 46.6, Jacked-In Voodoo Boy in 44 and Reboot Optics in 38.9%. Partners are Alt (57.7%) and Hanako (29.5%).
Judy herself: “When you play a BRAINDANCE Program, give a friendly Unit +1 power this turn. / {Spend} Trash the top card of your deck. If it’s a Program, you may add it to your hand.” No green means Take Control, Peace Offering, Memory Relapse and Hanako’s swaps drop out. The removal is the same bottom-deck package as in BBG, so the Gear and d4 rules carry over.
Bonnie’s targets in Judy: Lizzy Wizzy (2), Jacked-In Voodoo Boy (2), Maman Brigitte (3), Rita Wheeler (4), almost everything except Placide. The double mode only kicks in when you’re two Gigs behind. Reboot Optics (“The next time a rival Unit fights this turn, it doesn’t defeat the opposing friendly Unit.”) doesn’t stop Satori, because the fight is still won, and per the FAQ Appetite still steals. Nocturne can choose “A Unit can’t attack until your next turn”. Smasher after a Go Solo on your own turn is safe from that (the Program isn’t Quick), but the following turn he isn’t. Sideboard as against BBG: three Meredith in, two Appetite and one Negotiators out. If your opponent plays Trust No One on one of your Gigs instead of their own, that triggers Meredith.
Mirror: RRY and double red
The mirror comes down to the first Yorinobu and the first Smasher, so plan your Calls and removal around them. RareTotem: “The mirror match is going to be a blood bath for certain and is going to be your other most difficult one to win, as your strategies will be identical to theirs.” Smasher is what tips the scales, the video goes on.
Your rival probably isn’t running this trio. RRY decks run Meredith Stout 63% of the time, trio decks only 11%, and the most common RR trio is Dexter, Muamar and V (15 decks). Numbers to know: Yorinobu (9) loses to Animals Wrecker (10). A rival Meredith (7 against Legends) beats V after Go Solo (6) but loses to Smasher (9). Smasher’s Play effect answers the rival Yorinobu. In the mirror, Bonnie only hits Negotiators and unequipped 3s and 4s.
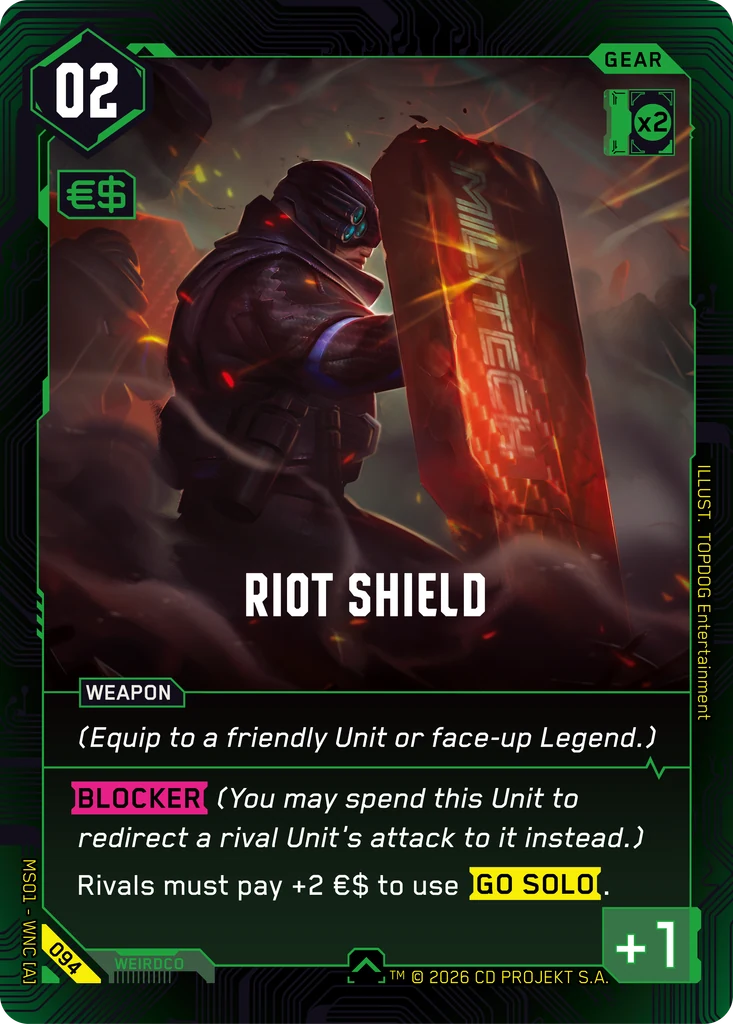
MaxTac Suppression Team (“Rival Units can’t attack the turn they’re played.”) stops the free Unit of a rival Yorinobu and every Go Solo attack; the FAQ confirms that for Go Solo. Per the FAQ, Detonate also hits Gear on face-up Legends, so the pre-installed Smasher too. Our sideboard: one MaxTac and two Detonate in, two Appetite and one Over the Edge out. Meredith can come in for Negotiators if you like, since she blocks Go Solo Legends at 7. The pricey alternative is Johnny Silverhand: Never Stop Fighting (red, RAM 2), who “wins all fights against CORPO Units”, and Yorinobu, Negotiators and Meredith are all Corpo. By Cardmarket, though, the card runs a €8.44 trend as a Beta foil, so it stays an option on our list.
Seven sideboard cards, suggested by us
Neither Sapiens26 nor RareTotem published a sideboard, yet tournaments require exactly seven cards.*18 So we picked seven that cover the three most common opponent types. This selection is our own suggestion.
| Qty | Card | Color / RAM | Cost / Power | Against | Where other lists run it |
|---|---|---|---|---|---|
| 3 | Meredith Stout: Stone Cold Corpo | Red / 1 | 4 / 5 | BBG, Judy, mirror | 63% of all RRY main decks; sideboard in “RRG Tempo” (2) and “yorinobu-rry” (1); recommended by RareTotem |
| 2 | Detonate | Red / 2 | 1 / – | River Ward, mirror | sideboard in “RED Cyberdeck Wins” (1), “RRG Tempo” (2), “RRY Solo” (2), “RRG Wrecker” (1) |
| 1 | Heywood Ripperdoc | Yellow / 1 | 6 / 8 | River Ward | TimFandango “Heywood against Gears”; sideboard in “The DMV” (2) |
| 1 | MaxTac Suppression Team | Yellow / 1 | 5 / 7 | mirror, Go Solo decks, Adrenaline | sideboard in “RRY Solo” (2) |
The list’s RAM budget is 4 for red and 2 for yellow, and the highest value in the sideboard is Detonate at red 2, so everything’s legal. Only cards that could go in the main deck are allowed in the sideboard, and no Legends.
| Opponent | In | Out |
|---|---|---|
| BBG | 3 Meredith | 2 Appetite, 1 Negotiators |
| Judy mono-blue | 3 Meredith | 2 Appetite, 1 Negotiators |
| River Ward Gear | 2 Detonate, 1 Heywood | 2 Appetite, 1 Industrial Assembly |
| Mirror | 1 MaxTac, 2 Detonate | 2 Appetite, 1 Over the Edge |
The main deck stays at 41 cards with every swap. Riot Shield and Take Control were out from the start, both green and outside the RAM budget. Royce: Don’t Call Me Simon (TimFandango recommends “Royce against BBG”) overlaps with Bonnie and Clyde. Deadman Transmitter only protects against defeat, not against bottom-decking. Chrome Fang protects against steals, which barely matters against BBG. By Cardmarket, the sideboard costs €1.13: Meredith three times at €0.29 (foil trend), Detonate twice at €0.09, Heywood at €0.02 from The Heist Beta starter deck and MaxTac at €0.06.
These slots are safe to swap
For a rebuild, these slots cost you the least of your game plan.
| Slot | Candidate in | Evidence | Effect |
|---|---|---|---|
| 2 Appetite | 2 Meredith Stout | 63% of RRY decks, recommended by RareTotem | two more Yorinobu targets, protection against Hanako and Trust No One already in the main deck |
| 1 card above 40 | cut it | minimum size 40 | slightly better odds to draw each core card; no source gives a reason for the 41st card |
| 3 Negotiators | 3 Dexter DeShawn: One Last Chance | “Chrome Armageddon” | 4 instead of 2 power, Gig adjustment on play and attack, same cost; but €8.65 apiece and no Blocker |
| 1 to 2 Industrial Assembly | Secondhand Bombus | 67% of trio decks | Blocker for 2 €$; power 0, though, which makes it a bottom-deck candidate against BBG |
| 1 Over the Edge | 1 Shattered Memories | “Chrome Armageddon” (1), “RED Cyberdeck Wins” (2) | hand reset, Braindance for V |
| 1 to 2 Rockn‘ | Kiroshi Optics or Arasaka Emergency Radioport | Kiroshi 44% in the trio, Radioport 23% in RR | Radioport makes the blind Call partly plannable and saves an Eddie |
| – | ripperdeck variant: +1 Appetite, −2 Industrial Assembly (40 cards) | variant on ripperdeck | more combat steals, less Gig control; worse against BBG |
The Radioport deserves one more sentence. Its text: “look at a friendly face-down Legend. If that Legend is ARASAKA or has {Go Solo}, you may Call it for free.” Smasher and V qualify, Dum Dum doesn’t. You get to peek before you Call, and at best you pay nothing.
Fourteen mistakes the cards themselves give away
Every one of these loses games, and every one is avoidable if you read the card text or the FAQ.
Calling early just to see what shows up burns an Eddie out of a tight budget, and a Smasher Call does nothing right away anyway. On turn 4, that Call costs you the Yorinobu.
Counting on a Gig steal from Yorinobu’s free Unit on turn 4 means your math is off. It only hits the Gig area with Adrenaline, and only spent Units are valid targets.
Calling Smasher and then waiting for the Play effect gets you nothing, because it only fires when he’s played to the field.
Empty your whole turn and the Eddie for Dum Dum’s pump during your rival’s turn isn’t there. Your Eddies only ready at the start of your own turn.
Exactly 10 is cutting it too fine. Floor It (minus 1 power) turns that into one Gig, which is why the robust number is 11. Against Take Control (one fewer stolen Gig) even 11 doesn’t help, and if you then attack with less than 10 power, you steal nothing at all.
Against BBG, pushing your own Street Cred up unlocks Towerfall’s double mode.
Over the Edge before your d20 is a wasted card, since without your own d20 it defeats nothing. Sell it early.
All is Lost isn’t a trash filler for Units. It forces a trashed Unit into your hand.
Gear on a Unit that’s about to be tucked is Gear thrown away, because it goes along. Park it on the face-up Smasher in the Legends area instead.
Satori in a tie draws nothing. At equal power both lose.
Two 3-cost Units on turn 3 against BBG with Towerfall forgotten: exactly what RareTotem warns against.
Against River Ward, sitting two Gigs ahead switches on Adrenaline Converter.
A Constructed tournament that requires a sideboard won’t let you in with 41 cards and no sideboard. Only the Quick BO1 format (a single game) at your local store runs without one.
And V via Go Solo into a ready Meredith Stout ends 6 against 7.
How to crack this list from the other side
From across the table, these are the levers that break the game plan.
Tuck Units under the deck instead of defeating them, because every bottom-decked Unit is one Yorinobu can’t find in the trash (Wild Things describes the problem from the BBG side). Count the six Yorinobu targets while you’re at it: three 6th Street and three Negotiators. With them in the trash, Yorinobu is dangerous; with them under the deck, he’s a 9-power body and nothing more.
Keep your Units ready. The free Unit and every new Unit without Adrenaline can only attack spent Units, so if you don’t attack, there’s no target. Of course, not attacking also means no stolen Gigs. You’re trading tempo for safety.
Count the Eddies. A face-up Smasher plus 9 visible €$ means Go Solo next turn, and Riot Shield (+2) or MaxTac (no attack) should go down before that. Detonate hits Gear on face-up Legends, and Meredith Stout beats V 7 to 6.
Bet on a clogged hand. 15 Units with no Sell Tag means a hand with four Units can only sell one card per turn. Be careful with discard, though. Discarded Units land in the trash and feed Yorinobu, so discard cuts both ways against this list. Then there’s the Wild Things tactic: allow the early steals, flip the Gig lead with Placide.
Your first tournament comes with a checklist
The tournament rules, boiled down to what you need before signing up. Your deck has 40 to 50 cards and a sideboard of exactly seven cards, and Legends don’t get swapped. A BO3 (best of three, two game wins) runs 50 minutes, in the top cut (the elimination rounds after the Swiss rounds) 75 minutes. Between games you get 2 minutes for sideboarding, 3 minutes in Competitive BO1. The Quick BO1 at your store runs without a sideboard.
From Competition level up, you submit your decklist on Melee.gg. After the match you reveal all three Legends. Legends in alternate materials are allowed as long as all three match, are double-sleeved and can’t be told apart face-down. The rules require “opaque standard-sized card sleeves” and “One 6-set of polyhedral dice with the following values: d4-d6-d8-d10-d12-d20”. That means a polyhedral dice set from d4 to d20 and opaque, uniform standard-size sleeves. Pointers: dice sets (affiliate link), card sleeves (affiliate link).
According to Mythras, after the Pre-Release events from October 30 to November 1, official events continue with weekly Brawl events from November 6 and a Showdown window from November 13 to December 6. In Europe, per the announcement, the Edgerunner Open Regional in Warsaw follows on January 30 and 31, 2027.
Under €8, with a catch
By Cardmarket trend the list costs you €6.47, or €7.60 with our sideboard. Prices come from the Cardmarket price guide of October 14, 2026, 02:53. We counted the three Legends plus 41 cards, each in the cheapest regular version from the Beta set or the Beta starter decks. The value used is the trend price; where that sits at 0, the foil trend. We didn’t include other retailers.
“Chrome Armageddon Sapiens modded”, by comparison, costs €32.09, mainly because of three Dexter DeShawn: One Last Chance at €8.65 apiece. As a single, Dexter is cheapest on Cardmarket from the Heist Beta starter deck; at retail the card only comes in The Heist starter deck. “RED Cyberdeck Wins” costs €7.19. The priciest lines in our list are three Yorinobu for €1.83 (foil trend €0.61 apiece), three Bonnie and Clyde for €0.42 and three Satori for €0.42.
Now the catch, and it’s about foils. Rares and Epics like Smasher, V, Dum Dum, Yorinobu and Meredith have no regular trend price, only a foil trend: Smasher €0.33, V €0.27, Dum Dum €0.34, Yorinobu €0.61, Meredith €0.29. Pocket change on very few listings, and not a reliable market value. The Iconic versions live in another world entirely: Smasher from €99 (foil trend €120.25), V from €95 (€133.39), Dum Dum from €79 (€86.29). They play exactly the same.
Right now Cardmarket lists singles from, among others, the Beta set, Beta starter decks, the Pre-Release Beta Kit, demo decks and Alpha, plus two smaller categories with individual Legends, including a Smasher product. Retail singles don’t exist yet; retail is sealed only. Beta and retail prints of Welcome to Night City are tournament legal, the Alpha Kit is not, with the exception of the Nova Rare Alpha cards. Sealed, a retail booster costs €5.00, the retail booster box €105.16, the retail starter decks Embracing Power €27.76 and The Heist €28.11. At retail, the list’s Rares only come from boosters.
The price guide doesn’t separate card languages. The card API lists retail prints in English and French and no German print. Doesn’t matter for tournaments, where any official language is allowed.*19 Expect all of these prices to move a lot after the retail launch on November 6.
Buying in Europe
All prices are trend values from the official Cardmarket price guide (October 14, 2026): Legends and main deck €6.47, with our seven-card sideboard €7.60. “Chrome Armageddon Sapiens modded” comes to €32.09, “RED Cyberdeck Wins” to €7.19. Sealed retail: booster €5.00, booster box €105.16, starters Embracing Power €27.76 and The Heist €28.11. Cardmarket lists many Beta Rares and Epics only with a foil price, and the guide doesn’t separate card languages.
The rules behind the asterisks
*1 Blind Legends: you shuffle the three Legends face-down, don’t look at them yourself, and flip one on a Call without knowing which.
*2 Go Solo: a face-up Legend with Go Solo enters the field ready for its cost, can attack right away and is removed from the game as soon as it leaves the field. Per the FAQ that also works on the same turn as the Call.
*3 Legends as money: every Legend in the Legends area pays one Eddie, a face-up one only if it carries the Sell Tag icon.
*4 First-player handicap: whoever goes first has only one Legend to pay with on turn 1.
*5 Legend without Go Solo: a Legend with a number cost can also be played to the field normally, and then it can only attack next turn. Per its card text, Riot Shield only taxes Go Solo. Per the Comprehensive Rules, for a face-down card you ignore all card information except that it’s a Legend. So a face-down Smasher has no number cost and can’t be played to the field. The same rule means Go Solo only works with a face-up Legend.
*6 Yorinobu’s free Unit: it can only attack Units, and only spent rival Units are valid targets. Per the FAQ it only attacks the Gig area with Adrenaline.
*7 Steal formula: from 10 power a Unit steals two Gigs, from 20 three.
*8 Gear moves along: Gear on a Legend stays equipped on Go Solo, because the Legend only swaps the Legends area for the field.
*9 Satori and ties: at equal power both lose, and Satori draws nothing.
*10 Faceplate on Legends: if you pay with an equipped Legend, Faceplate resolves after the card is played.
*11 All is Lost: if the effect hits a Unit, it has to go to your hand, so it doesn’t stay in the trash as Yorinobu food.
*12 Industrial Assembly on rival dice: the card can also raise one of your opponent’s dice.
*13 Appetite: you commit to one Unit when you play it.
*14 d20 last: the d20 enters play on your sixth own turn at the earliest, unless you steal your opponent’s.
*15 Mulligan: you can shuffle your whole opening hand back once and draw six new cards, with no card penalty.
*16 Negative values: a Unit with 2 power under minus 4 is at minus 2 on paper and counts as 0.
*17 Street Cred: Street Cred is the sum of your dice values. Towerfall gets stronger when the BBG player has less of it.
*18 Sideboard: tournament decks need exactly seven reserve cards. You can’t swap Legends, and the card count of the deck stays the same.
*19 Language at tournaments: cards in any official language are allowed as long as both players understand them. When in doubt, the English text applies.
The data is still thin
Double-check before you bet a tournament on this list. Tournament data is missing entirely, and every matchup statement in this guide is opinion or derivation. The reference list has thin backing, and RareTotem’s own favorite is a different list; we picked the beginner list on purpose.
We didn’t match the video against the builder list frame by frame. The attribution rests on the Legends, the “two copies of Appetite” and the uploader RareTotem; the video’s upload date is unknown. Our trash probabilities for All is Lost and V’s Call are approximations with the full 41-card deck, ignoring cards already drawn. Treat them as ballpark figures.
One rules question isn’t explicitly settled, namely whether you can spend the Legend you’re about to flip to pay for the Call. In practice, yes. The rules assume that a spent face-down Legend can be Called and forbid it nowhere. Our budget math doesn’t depend on it anyway, since every Legend pays one Eddie.
Not covered: the “Red Red X primer” by XBD, further gameplay episodes from RareTotem, and Reddit (blocked for us). “RED Cyberdeck Wins” was edited on the day we pulled it and may keep changing. The Cardmarket prices come from the price guide of October 14, 2026 and are based on Beta prints with few listings.
Sources: Decklist (credit Sapiens26, posted by RareTotem) in the official builder · RareTotem, RRY video · HungSpellboundGames, “Chrome Armageddon Sapiens modded” · TimFandango, “RED Cyberdeck Wins” · ripperdeck, 40-card variant · card API · Comprehensive Rules, official rules FAQ, tournament rules · ExBurst, Adam Smasher stats · Gamertag Mythras, community decks · Wild Things Games, BBG overview · Cardmarket and Cardmarket price guide (as of Oct 14, 2026) · our BBG guide, our Gear guide
Matching products on Amazon*
*Affiliate links: we earn a small commission on purchases. The price stays the same for you.

// KOMMENTARE (0)